To avoid these ads, REGISTER NOW!

Super Street/ Super Gas Fairlane Build

OP
M

MP&C

Well-known member
Joined
Oct 21, 2009
Messages
4,403
Location
Leonardtown, MD
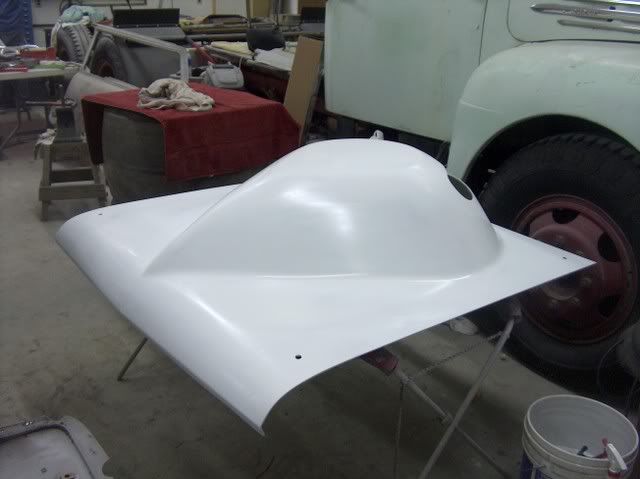
Here's a bit of exposure he got in Drag Review Magazine. Click on the pictures for a larger image.


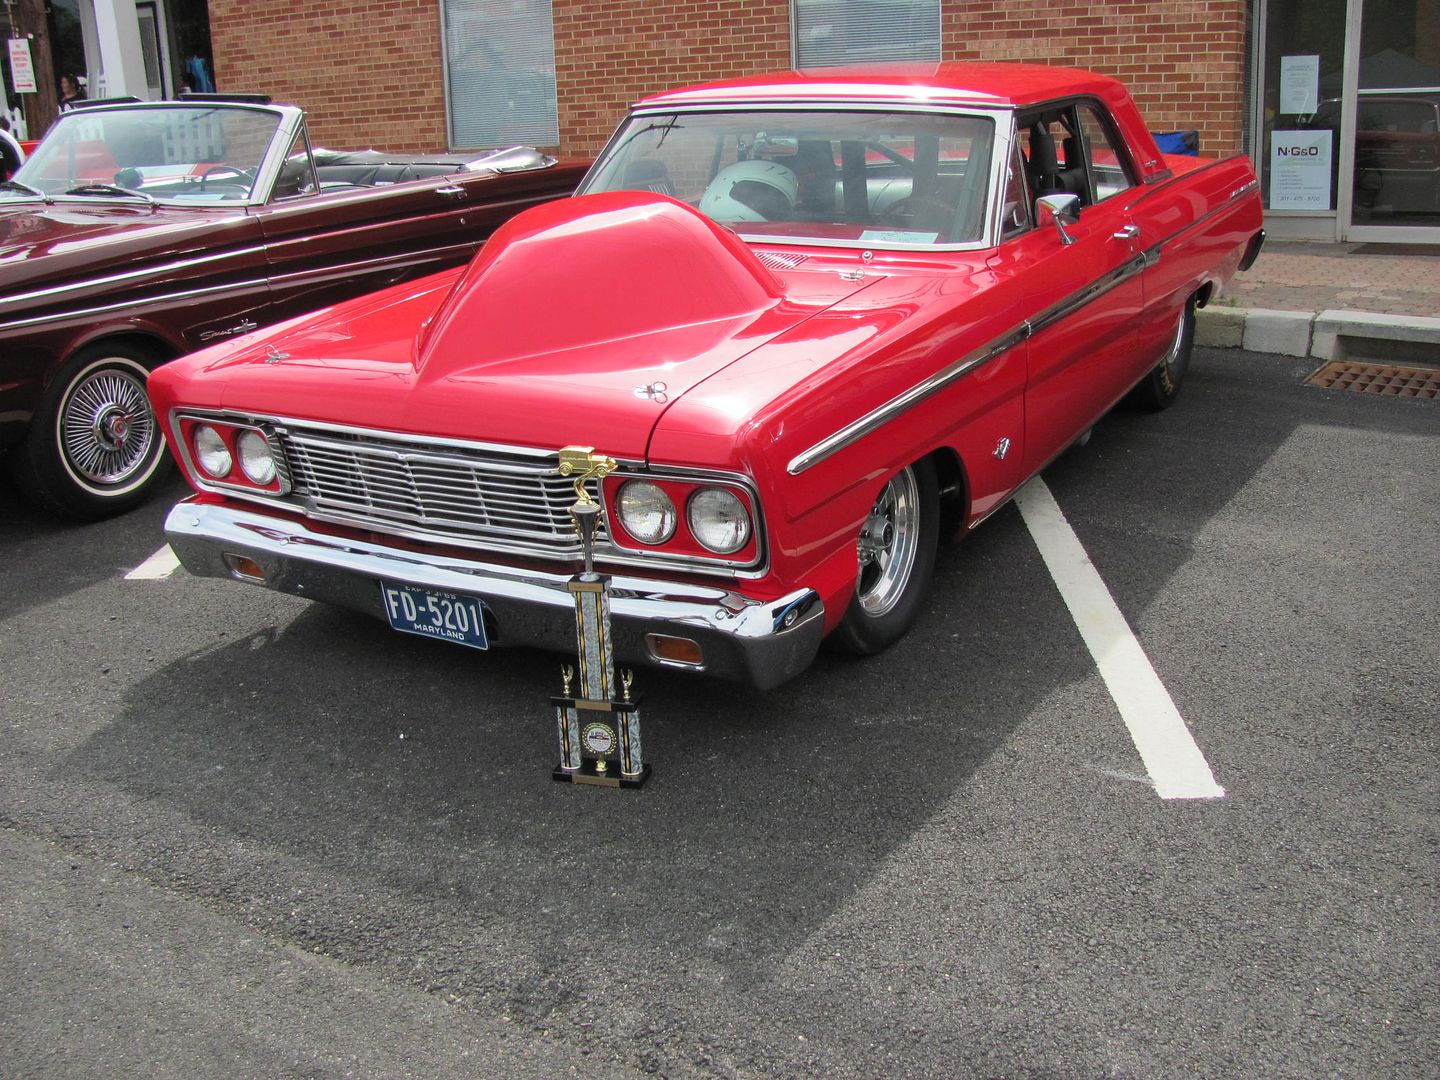
The car took People's Choice at the first car show outing...


Picture516.jpg


.....and with that behind, we could then start to add the contingency and sponsor decals...


Picture519.jpg


Picture522.jpg


In all, my part of this build was about a 11 month exercise, on a part time basis. I think Brad is very pleased with the results, and the car draws a crowd every time it is out...
 
To avoid these ads, REGISTER NOW!
OP
M

MP&C

Well-known member
Joined
Oct 21, 2009
Messages
4,403
Location
Leonardtown, MD
He tells me with the class he is running, he only needs to see one light. The height of the scoop actually added 2" (roughly) to allow the hood rear to close, and about 3" for clearance around the carb. The best was when he broke out the rule book on hood scoop heights, of course after the hood had been painted and buffed. We made it by about 1/2"...Whew!
 
OP
M

MP&C

Well-known member
Joined
Oct 21, 2009
Messages
4,403
Location
Leonardtown, MD
I stand corrected, just spoke to the owner and the chassis is certified to 7.50


Here is the view (pre-paint)


Picture028-1.jpg
 

Zeke

Well-known member
Joined
Aug 13, 2009
Messages
17,176
Location
Long Beach CA, the sewer by the sea.
This thread could have easily been 3 or more, but I enjoyed every post. Great work! You were trying my patience there at the rust repair and I was just sitting here. That's because I have BTDT.

I like the part where you said something like, "I welded up a couple of the pin holes and a couple more just kept getting bigger." That, my friend, is what we like to describe as welding up a screen door. :D
 

eborcim

Well-known member
Joined
Apr 5, 2009
Messages
2,425
Location
Central, MO
Robert, excellent tour of the body work you and your crew performed! It was a treat watching how you fixed the body imperfections.
 
OP
M

MP&C

Well-known member
Joined
Oct 21, 2009
Messages
4,403
Location
Leonardtown, MD
Thanks for the comments guys..


"I welded up a couple of the pin holes and a couple more just kept getting bigger." That, my friend, is what we like to describe as welding up a screen door. :D


Yeah, at some point you just need to break out that new metal...:thumbup:
 
OP
M

MP&C

Well-known member
Joined
Oct 21, 2009
Messages
4,403
Location
Leonardtown, MD
Video for your viewing pleasure. This was his first run, trans brake didn't work, line lock wasn't adjusted right, and your truly, the camera operator didn't do so well at videos. Thru all the hiccups and butterflies, I'm sure, he still ran a 10.54. He plans to run on throttle stops in the 10.90 class. If he had his shtuff together, this run should have been high 8's, low 9's easy.


Last edited:

e-tek

Well-known member
Joined
Dec 19, 2007
Messages
10,690
Location
Saskatoon, SK
Holy COW - you must have put as much time into posting up all these pics as doing the car!!! Awesome and thanks!

We did run across more metalwork to fix prior to painting. The front fender had a hole for the antenna, which he didn't plan to use, so it was filled.

Picture285.jpg


Is this the same part in both photo's - or are you showing something else? I just noticed the top-side painted in the second but not the first....hard to tell.

Picture289.jpg


And just when you're ready to load parts in the paint booth, this shows up:

I just had that happen on the 56 Chevy - I almost need a big light and magnifying glasses to catch everything!

Picture299.jpg


Wonder what caused that?

RUST - IT NEVER SLEEPS!!!

Picture301.jpg


Do you put any rust paint or Zinc (weld-thru) primer in there?

Picture303.jpg


Front side primed, slick Sand high build, and guide coat (next day):

I always use 2K for block sanding, but decided to try the Slick-Sand last week on the 56 Chev,(which is sprayable filler for you non AB guys) and decided I HATE it! :) Have you used it a lot? That stuff barely goes through a 2.0 tip and takes a long time to sand down to a reasonable end-thickness I can see using it over questionable bodywork, .but you do nice work!


Picture314.jpg


AWESOME WORK!!! I love those cars!

Mind if ask a bunch of Q's: How long have you owned your shop? Where abouts are you? How many employees? Do you do moslty collision work or resto (I know the $$ is in collision!) Have you done any writing for magazines or online media? You'd be great at it!
 
OP
M

MP&C

Well-known member
Joined
Oct 21, 2009
Messages
4,403
Location
Leonardtown, MD
Responses below in blue text


Holy COW - you must have put as much time into posting up all these pics as doing the car!!! Awesome and thanks!

We did run across more metalwork to fix prior to painting. The front fender had a hole for the antenna, which he didn't plan to use, so it was filled.

Picture285.jpg


Is this the same part in both photo's - or are you showing something else? I just noticed the top-side painted in the second but not the first....hard to tell.

Actually, that's not paint, its just a change in lighting (camera flash on second pic) that caused that appearance. If you look close, you can see still see the DA marks in the metal. That's a before and after filling the antenna hole...

Picture289.jpg


And just when you're ready to load parts in the paint booth, this shows up:

I just had that happen on the 56 Chevy - I almost need a big light and magnifying glasses to catch everything!

Those dark brown circles I was telling you about....are a good indicator of rust scale coming through.....something to look for in any dirt/mud/rust collection area

Picture299.jpg


Wonder what caused that?

RUST - IT NEVER SLEEPS!!!

Picture301.jpg


Do you put any rust paint or Zinc (weld-thru) primer in there?


A restoration publication I read years ago had conducted a test of long term performance of epoxy vs. weld through primers, and their testing concluded that Epoxy primer performed better in protecting against the return of rust. So typically I use epoxy primer and in the instance of plug welds, will clean out the hole of paint prior to welding. Other restorers I have conferred with also have indicated to me that weld through needs to be of minimal build or cleaned out of the plug weld holes or weld contamination results. This door (both actually) was one of the few instances where I will use POR products (accessibilty limitations), because short of removing a door skin completely, one can never know what else lies in wait. Inspection inside the door seemed to indicate the damage to the door skin was limited to the area shown, so after the metalwork was complete, a turkey baster was used to apply POR to the entire perimeter of the inside seam, rolling the door up on end as needed.


Picture303.jpg


Front side primed, slick Sand high build, and guide coat (next day):

I always use 2K for block sanding, but decided to try the Slick-Sand last week on the 56 Chev,(which is sprayable filler for you non AB guys) and decided I HATE it! :) Have you used it a lot? That stuff barely goes through a 2.0 tip and takes a long time to sand down to a reasonable end-thickness I can see using it over questionable bodywork, .but you do nice work!


I used a 2.2 tip for spraying the Slick Sand. Definitely needs a larger tip size than used for Epoxy primer. The biggest advantage of using a "sprayable" filler over a spreadable type is that you can apply a more consistant build thickness. If your door (or whatever panel) is somewhat flat to begin with, sprayable filler will do a better job keeping it that way.

Picture314.jpg


AWESOME WORK!!! I love those cars!

Mind if ask a bunch of Q's: How long have you owned your shop? Where abouts are you? How many employees? Do you do moslty collision work or resto (I know the $$ is in collision!) Have you done any writing for magazines or online media? You'd be great at it!


I've been working on restorations for about fifteen years now, and this is presently a part time venture, located in Southern MD. My nephew is the only other employee, other than specialty help that gets farmed out, like the fiberglass work on the hood. I turn away collision work as I don't want the insurance companies telling me how to do my job. Body shops don't like rust repairs, and I like the challenge. Presently the only "articles" I have done have been how-to threads on forums just like this one. I am in process of writing a more detailed article(s) of various areas of the restoration of this car for the Fairlane Club of America and its magazine, the Fairlaner. But thus far, no others. Thanks for the kudos..
 
Last edited:

NovaRacR

Member
Joined
Nov 4, 2010
Messages
12
Location
North Carolina
Nice build....

and a good-looking car on top of that....even to be a Ford....j/k, have a mustang in my shop now, will post pics when we get it up and running.

WB
 
OP
M

MP&C

Well-known member
Joined
Oct 21, 2009
Messages
4,403
Location
Leonardtown, MD
Thanks!

One thing I forgot to put in a few threads back, while re-assembling the car I came up with a door installation fixture as these things were quite heavy and we didn't need any paint chips....

I had seen some of the cradle style that you could add to your floor jack, but I have a problem how the cradle supports the complete weight of the door across the lower edge of a door skin. Too much risk of paint damage in my view. So I came up with another version that would support the weight across a wider area on the inner door, for less risk of damage to any visible area.

Here's the basic form, with some pipe receivers using set screws. The support braces are bent from electrical EMT and covered in pipe insulation to protect the finish..


Picture487-1.jpg


Picture488-1.jpg


Picture489-1.jpg


The support braces also help to keep the door oriented in a vertical position, to keep the door from flopping back and forth (as you may experience with the cradle style). This will help prevent paint damage/chips from excessive door movement during the install.


Picture267-1.jpg


Picture269-1.jpg


Notice nothing touches the edge of the door skin....


Picture270-1.jpg


Picture271-1.jpg


Once hinges are snug, loosen set screws for outer support brace, lower a couple inches, remove outer support brace, and simply pull jack toward rear of car to clear door.


Picture272-1.jpg


Picture274-1.jpg


Picture275-1.jpg
 
Last edited:

coronet

Member
Joined
Dec 24, 2009
Messages
8
I Wish I was closer to you.I would love to have you do my car.Outstanding workmanship.It is hard to find that now a days. I hope I am not out of line.What does a job like that cost?
 
To avoid these ads, REGISTER NOW!
OP
M

MP&C

Well-known member
Joined
Oct 21, 2009
Messages
4,403
Location
Leonardtown, MD
Thanks for the comments guys. Coronet, depends on car, condition, availability of parts/need for fabrication. This one was in neighborhood of a 15-20K build for rust repair, paint work, reassembly, wiring, etc.
 
OP
M

MP&C

Well-known member
Joined
Oct 21, 2009
Messages
4,403
Location
Leonardtown, MD
Well Brad got a bit more ink, here's his car in the latest issue of Fairlaner.....


(Click on picture to open a larger view)

I think it's been in more magazines and car shows than races... :bounce:
 

bimmer1980

Well-known member
Joined
Feb 5, 2009
Messages
2,104
Location
York, PA
Nice work! I love the detail on the process and the metal working machines. I would really like to find a nice manual press brake like what you have...

Thanks for sharing!
 
OP
M

MP&C

Well-known member
Joined
Oct 21, 2009
Messages
4,403
Location
Leonardtown, MD
Thanks for the comments. The manual press brakes are for sale online all the time. Look for Diacro 2' press brake. Average price with stand is 1000-1500+ depending on the dies that come with it. Cheaper is a real good deal.
 

b-body-bob

Well-known member
Joined
Oct 10, 2011
Messages
1,621
Location
Almost Heaven
I wish there was some sort of directory so I could find a person in my local area with skills like those showcased in the thread.
 

pop pop

Well-known member
Joined
Apr 1, 2010
Messages
2,859
Location
Virginia
The chassis is certified NHRA and IHRA I believe to 8.50...If I find out different, I'll post the info...


Got the hood wet sanded and test fit the Griffin radiator.......


Picture118-1.jpg


Picture120-1.jpg


Picture122-1.jpg


In addition to getting some more wet sanding done, (hoping to spray more red tomorrow) we had noticed a patch of lead in the B-pillar on the passenger side. Used the torch to melt it out, only to reveal a nice hole punched in. Judging from the direction the striking object must have travelled, it appears the door was not installed at the time. Looks like it had to be damaged and repaired at the factory??


Picture123-1.jpg


Picture124-1.jpg


Picture125-1.jpg


Picture126-1.jpg


Picture127-1.jpg


I've been told this was likely a "suspended" spot welder that was overzealously swung into the car at the factory?


Pictures of the factory damage reminds me of a plant tour I had of the Atlanta assembly plant for Fairlanes in 1966. There was a 90 degree turn in the conveyor of the welded body and one didn't make the turn, bouncing onto the floor about 4' down. A bunch of guys just picked the body up and placed it back on the conveyor and it proceeded on to paint. Things happen there too!

On the exit, they had a dyno to check shift points etc. One of the big engined GT models rolled out about the time we got there and they reved it up and almost damaged the dyno. Our tour guidy hurried us away before the guys tore up the plant trying to show off.

Nice job. Wish I had the time, skill, and tools!
 

JDS968

Well-known member
Joined
Apr 14, 2012
Messages
247
Location
Miami Beach, FL
Very cool. Very, very cool. Truly impressive work.

I'm curious, though...at some point, maybe right around when you were saying, "Order a second teardrop"...did it ever occur to anybody to say, "What if we ditched that tall intake and that huge single downdraft carb, and went with a couple of sidedrafts with short runners, crammed into the valley?" Or is that heresy? :lol:
 
OP
M

MP&C

Well-known member
Joined
Oct 21, 2009
Messages
4,403
Location
Leonardtown, MD
I'm curious, though...at some point, maybe right around when you were saying, "Order a second teardrop"...did it ever occur to anybody to say, "What if we ditched that tall intake and that huge single downdraft carb, and went with a couple of sidedrafts with short runners, crammed into the valley?" Or is that heresy? :lol:

Unfortunately, the engine had to be raised up somewhat so the fluidamper could clear the rack and pinion. So along with that came the hood clearance issues. If I remember correctly, the front end of the valve covers make use of the space inside the hood bulge.


Pop pop, thanks for sharing your factory tour experiences, I guess it goes to show anything can happen!
 
Last edited:

zmaxmotorsports

Well-known member
Joined
Jan 11, 2013
Messages
11,948
Location
South of omaha
Thanks for the comments.

After fixing the drip rail on the drivers side, the other side is already suspect for similar damage. The owner was hoping we could get by with leaving the passenger side alone. There was some deep pitting in the drip rail, and some visible where the seam sealer was removed. Found two small holes in the outer part of the drip rail, which I thought could be welded up if I had to........but where the inner part of the drip rail spot welds to the underside of the sail panel, I could feel the telltale signs. The metal had swelled up, giving the indication of some rust scale lurking between.


Picture035-1.jpg


Note pin holes:


Picture034-1.jpg


The owner really didn't want to cut this side open, so what's an ****-retentive guy with a bunch of raw sheet metal to do? So I waited for him to go on travel for work, called him up and then told him the bad news. :D


Picture037-1.jpg


Picture039-1.jpg


Replacement fitted and welded:


Picture040.jpg


Picture042.jpg


Picture043.jpg


Picture046.jpg


Picture049.jpg


Picture050.jpg


Picture052.jpg


Picture054.jpg


Picture056.jpg


There, all put back together, before he could protest too loudly ;)

Man this is better than caffeine or any drugs out there!:lol:
To say you do beautiful work is the understatement of the century!:drool::drool::drool::drool::drool::beer:
 

1971gsfan

Well-known member
Joined
Dec 19, 2009
Messages
84
Location
Wilmington NC
just read this entire post! Beautiful work I'm learning a lot watching how you do things. I can't wait to get some shop tools (brake, shear etc) to work with. What books or videos would you recommend for a beginner to read?:thumbup:

Thanks
Tim
 

Kevin54

MEMBER EMERITUS
Joined
Jan 12, 2005
Messages
29,341
Location
Urbana, Ohio
Wow. I just read this complete thread again this morning. I had totally forgot that Robert did all of this work. So here's a bump for a lot of the newer members to see what kind of work gets done by one of our members. :rocker:
 

HIVOLTJ

Member
Joined
Dec 19, 2012
Messages
19
Wow, top shelf work. Enjoyed the thread immensely.

The hood reminds me of that 80's movie with the silver teardrop shaped UFO, what was it called, The Interceptor?
 

malibulvr

Well-known member
Joined
Jan 5, 2012
Messages
141
Location
Lockport, NY
Just amazing the amount of fabrication work you have put into this car! Where did you get your **** weld clamps? The spades look nice and thin and don't seem to leave a large gap like the HF ones do.
 
To avoid these ads, REGISTER NOW!
Top Bottom