To avoid these ads, REGISTER NOW!

Vise Stands. want to show yours off?? i need some ideas for using several vises

drivesitfar

Well-known member
Joined
Oct 23, 2013
Messages
36,037
Location
Pacific Northwest
I've seen some awesome vise stands over the years posted under the incredible vises most of you have in your shops and garages. while there is always the standard bench mounted one I have seen several that have made extensions to there benches for better access and trailer hitch type attachments that the vise can be stored out of the way when not in use.

feel free to brag if you just have a nice stand like the one I've found and admired over the years and wish I had if I had the space. it looks like part of a space ship and I bet it wasn't cheap to make.

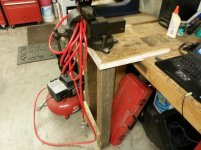
i'll start with the one I have my Parker 956 on that might weigh 200 pounds that I will drag outside when not raining in Seattle. it would be nice to figure out a way to put rollers on it that would stand steady while i'm using it.

Big, Small, Handy, Creative and Unique. post them all because some of us would like to use more than one vise or have better access to the one we do use.
 

Attachments

  • Parker 956 jaws closed.jpg
    Parker 956 jaws closed.jpg
    132.8 KB · Views: 436
  • Parker 956 vise open.jpg
    Parker 956 vise open.jpg
    142.6 KB · Views: 399
  • vice%20bmw%20002.jpg
    vice%20bmw%20002.jpg
    128.9 KB · Views: 546
  • vice%20jesse%20james.jpg
    vice%20jesse%20james.jpg
    36.6 KB · Views: 430
To avoid these ads, REGISTER NOW!

Davefr

Well-known member
Joined
Jan 7, 2010
Messages
11,839
Location
OR
Here are a couple. This one's my favorite. It's heavy but very low profile so it doesn't get in your way. It might have originally been from an industrial pedestal fan:

visebase%20003.jpg


visebase%20002.jpg


This one came with a very large Morgan vise. It's 1/2" plate steel and built like a brick *********. It's obviously unrestored.

P1020466.jpg
 

Farmall450

Well-known member
Joined
Dec 23, 2011
Messages
13,371
Location
Marengo, Illinois
Here are a couple. This one's my favorite. It's heavy but very low profile so it doesn't get in your way. It might have originally been from an industrial pedestal fan:

visebase%20003.jpg


visebase%20002.jpg


This one came with a very large Morgan vise. It's 1/2" plate steel and built like a brick *********. It's obviously unrestored.

P1020466.jpg

Nice wilton!

:beer:
 

wrenchguy

Well-known member
Joined
Sep 22, 2011
Messages
4,698
Location
NW Indiana
Re: Custom Rigid 80SN 8", 1500 Lbs. of clamping ****.

This has 36" x 24" footprint, 42" tall, upper & lower tool/parts trays. Its built on 1" thick plate with HD casters. The cast cylindrical part is 25" tall, 22" dia. at bottom and 16" dia. at top. I moved the vise forward (from original location) to get the vertical plane of the static jaw beyond the edge of the tray. Rolls ok so far...and haven't had to use wheel chocks yet. Waiting 4 a good warm & windy day to get the stars and stripes flying! The flags w/poles r easily removed.

I'm going to make another on 1" plate, casters but pouring a concrete cylinder using sono-tube 4 my Prentiss 58 heavy chipping vise. It also will have lower and upper tool/parts trays. thanks 4 looking.


great white tj

Well-known member
Joined
Apr 12, 2009
Messages
545
Location
Ocala Fl.
I've seen some awesome vise stands over the years posted under the incredible vises most of you have in your shops and garages. while there is always the standard bench mounted one I have seen several that have made extensions to there benches for better access and trailer hitch type attachments that the vise can be stored out of the way when not in use.

feel free to brag if you just have a nice stand like the one I've found and admired over the years and wish I had if I had the space. it looks like part of a space ship and I bet it wasn't cheap to make.

i'll start with the one I have my Parker 956 on that might weigh 200 pounds that I will drag outside when not raining in Seattle. it would be nice to figure out a way to put rollers on it that would stand steady while i'm using it.

Big, Small, Handy, Creative and Unique. post them all because some of us would like to use more than one vise or have better access to the one we do use.


Very nice..
 
OP
D

drivesitfar

Well-known member
Joined
Oct 23, 2013
Messages
36,037
Location
Pacific Northwest
thanks for the pictures guys and those stands are awesome and of course their vises are too.

Great White thanks for the kudos.

Filson I'm guessing the 208 will have a stand worthy of posting a few before and after pics of. Didn't you say it only weighs 275 pounds or thereabouts?

here's one I posted on the vise thread a while back that can either be installed on your truck like my client did that bought my Wilton C1 bullet that was a 1945 production date. I know he paid me a lot of money for that vise and when I heard where he was going to put it I was amazed, but he uses it almost everyday. i'm thinking of putting one of my smaller vises on something like this on one of my benches.

keep the pictures and conversation coming because we can never have too many pictures of our nice vises and how we display (i'll have to try and find the vise tree to post unless one of you has it saved and can post for me) or use them. feel free to post cool stands you have seen or know of too if that member hasn't or isn't a member.


Filson

Well-known member
Joined
Jun 14, 2013
Messages
1,218
Location
NE WA
278 lbs, yeah. I can't wait to get it in place finally. Pics will be shared. :)
 

metaldad

Well-known member
Joined
Aug 2, 2011
Messages
7,768
Location
nw indiana
plate is 1/2x12x12.
uprights are 1/4x2x2
original base was a 10'' 150# blind flange, which was too light.
drilled and tapped 1/2-13 with studs and nylock nuts to a 16'' 300# blind flange
 

SweetD

Well-known member
Joined
Feb 8, 2010
Messages
3,265
Location
Rhode Island
My setup is not free-standing like many of the nice setups shown in this thread already. But I do like my setup in that it is "offset" from my main bench, as it sticks out further and offers nice clearance. Crappy cluttered quick pic from a Friday night, but you get the idea:

Vise setup 2.jpg

:beer:

Dave
 

mcmlvif100

Well-known member
Joined
May 2, 2010
Messages
627
Location
Northern Indiana
Not mine but a couple of photos of Jesse James vise and stand that I saved for future reference. Close up shows the detail of the vise and mounting pad and bolts. Some beautiful work.
 

Attachments

  • Vise Stand - Jesse James - Close Up.jpg
    Vise Stand - Jesse James - Close Up.jpg
    29.9 KB · Views: 353
  • Vise Stand - Jesse James.jpg
    Vise Stand - Jesse James.jpg
    36.6 KB · Views: 338

HTGTS350

Banned
Joined
Mar 2, 2010
Messages
603
Made mine from various scrap bin bits.
 

Attachments

  • Vice on stand.jpg
    Vice on stand.jpg
    54 KB · Views: 329

KMScott

Well-known member
Joined
Feb 14, 2012
Messages
4,642
Location
Daufuskie Island, South Carolina
This one I made for my son two Christmas's ago with the three legs. i filled the 6 inch pipe with cement, the other one I bring with me when i work for machine shops. I am toolroom welder and most places do not have a good vise setup for holding workpieces for welding. i also like having a vise mounted on a stand and moving it to where I am working. The semi drum has never tipped over and i have had heavy stuff hanging on it.
 

Attachments

  • Wilton-2012 (35).jpg
    Wilton-2012 (35).jpg
    142 KB · Views: 249
  • Wilton 4 inch 5-1982 (1).jpg
    Wilton 4 inch 5-1982 (1).jpg
    134.9 KB · Views: 278
OP
D

drivesitfar

Well-known member
Joined
Oct 23, 2013
Messages
36,037
Location
Pacific Northwest
here's the Vise Bouquet picture for our thread so you won't have to go to another page to find it.

Mr. Scott: nice stands and especially nice jaws on those Wiltons. did you buy those 6 inch Wilton copper jaws from Bob and Maureen on E Bay and grind them down to fit your 4.5 inch jaws. I use my copper ones all the time and actually fold my wings down over my vises. as good as you are with metal did you just make longer screws for your jaws and put a couple holes in the copper ones so they don't move around?

great job with the posts guys and so many great ideas and creative minds on GJ.

 
OP
D

drivesitfar

Well-known member
Joined
Oct 23, 2013
Messages
36,037
Location
Pacific Northwest
I found this design for removing and changing vises or getting them out of the way if you don't need them for that project.

i'm not a welder (yet), but I have neighbors that are and looking for more variations of this if you might have any.
 

Attachments

  • attachment.jpg
    attachment.jpg
    135.9 KB · Views: 349
  • attachmentVN34XJY9.jpg
    attachmentVN34XJY9.jpg
    123.8 KB · Views: 267
  • attachmentSDH4OQMX.jpg
    attachmentSDH4OQMX.jpg
    128.5 KB · Views: 227
  • attachmentJG8IAO8H.jpg
    attachmentJG8IAO8H.jpg
    125.7 KB · Views: 243

kapster

Well-known member
Joined
Dec 14, 2011
Messages
517
Location
Wooster, Ohio
Like the wilton c1 on the truck, that would be a nice setup with a smaller vise on a bench like you said. I would think swinging a c1 would be a workout?

Here is my wilton 500 on a stand I made bolted to a semi brake drum. The stand I got out of the scrap hopper at work, was bolted to the floor in production at one time. Had to cut it off and weld a mount for the vise on one end. The brake drum I got from a semi repair shop for $15. This is my first vise on a pedestal and it really does make them so much more useable.

e2ytary8.jpg
 
To avoid these ads, REGISTER NOW!

metal1313

Well-known member
Joined
Apr 28, 2009
Messages
3,416
Location
clinton NJ
how tall are you guys mounting these? lower to make beating on them better or at bench height?

right now my free standing vise, a 4.5 in athol that has seen much, much better days, is mounted outside on a hunk of an oak tree, that moves more than i'd like
 
OP
D

drivesitfar

Well-known member
Joined
Oct 23, 2013
Messages
36,037
Location
Pacific Northwest
Kapster: personally I wouldn't be doing any beating on the vise itself even on it's anvil like area. of course you do need to persuade a few things once in a while so looks like the free standing ones are shorter than a bench.

make it customized for you. are you going to be using it sitting on the edge of your chair or standing up? take a measurement from the floor to the bottom of your elbow and maybe take a few inches off for the hammer's head is what i'm thinking.

if you are using an outside vise how about digging a hole about 18 inches or more if you have a heavy vise, a little gravel in the base, place your piece of steel in it and cement it there to last forever. then weld or bolt a plate to the top to bolt your vise on and that might steady your vise for years of use.

I love the stories on where you guys find the material to build your stands almost as much as I like looking at them. here's a grinder stand that might need to be shortened if I put one of my vises on it and mount the buffer to a bench that is similar to some of the stands so far.
 

Attachments

  • 3E83F63Hd5N45I75L3d5a3faebdc2fd4b123a.jpg
    3E83F63Hd5N45I75L3d5a3faebdc2fd4b123a.jpg
    44.7 KB · Views: 201
Last edited:
OP
D

drivesitfar

Well-known member
Joined
Oct 23, 2013
Messages
36,037
Location
Pacific Northwest
this isn't a stand i'm planning on making or using, but any idea how much cement needed to fill a 55 gallon metal drum??

i'm looking for more stands you put those great vises on or some of the unique bench versions that are removable or swing out from the bench. anybody have some to share pictures of and the way you made it if not obvious?
 

Attachments

  • oil drum filled with cement.jpg
    oil drum filled with cement.jpg
    152.5 KB · Views: 209
OP
D

drivesitfar

Well-known member
Joined
Oct 23, 2013
Messages
36,037
Location
Pacific Northwest
Tex: I wish I owned all those nicely restored vises. I was posting for another member that only added the link to the thread. I know it isn't his either and maybe the real owner has another one to post by now and I hope he does. Thanks for the kudos and one day maybe before too long I will have something as nice to share.
 

EOC_Jason

Well-known member
Joined
Jun 25, 2012
Messages
11,388
Location
Bentonville, AR
this isn't a stand i'm planning on making or using, but any idea how much cement needed to fill a 55 gallon metal drum??

i'm looking for more stands you put those great vises on or some of the unique bench versions that are removable or swing out from the bench. anybody have some to share pictures of and the way you made it if not obvious?

55 gal = ~0.27 yd3 If you are asking how many bags of quickcrete... :dunno:

I have a couple pictures of welding mine up on my other computer. Basically I just took a piece of steel plate and pre-drilled the holes for the vise. Then welded the plate to the length of pipe, finally welded that to the tire rim. Finish it off by filling the rim with concrete.

You want to maximize the weight down low. Having a bunch of weight up high doesn't really help (as in the 55 gallon drum). Also increasing the footprint (at least in the front) help to prevent thing from tipping when you have the vise open.
 
OP
D

drivesitfar

Well-known member
Joined
Oct 23, 2013
Messages
36,037
Location
Pacific Northwest
as I mentioned it wouldn't be my first choice of a stand and nor the best use of 3 yards of concrete. I need a new driveway more than a vise stand.

Jason thanks for the figures and any idea how much 3 yards weighs? just curious if you still have any of those huge nice stands you picked up with the big Reeds you just bought that you can post??

I like this member's smaller vise mounted to the bench leg and he mentioned in his post that it would also work on the wife's dining room table.
 

Attachments

  • user73849_pic21307_1341522936.jpg
    user73849_pic21307_1341522936.jpg
    81.2 KB · Views: 290

toolmaniac

Active member
Joined
Dec 23, 2013
Messages
29
Location
Thessaloniki, Greece
I am attaching a picture of my 5 inch Peddinhaus, which I mounted on a concrete filled rim. It works well, but I do plan to add a couple of wheels to make it mobile (much like a handtruck).
 

Attachments

  • 5 inch Peddinghaus.JPG
    5 inch Peddinghaus.JPG
    106.9 KB · Views: 173
OP
D

drivesitfar

Well-known member
Joined
Oct 23, 2013
Messages
36,037
Location
Pacific Northwest
can some of you handier members that built your stands show any pictures of the process you did not only to keep the post inside the rim or cement, but also what you used for plate that you mount your vise to. love the ideas of the wheels and here's one I saw that one of our handy members made out of some scrap (plate at base weighs about 400 pounds).

also how you attached the plate to the post even if showing a weld. any bolt on ones would be great to show for those of us that don't weld.

Fretters: I hear what you said about the knee buster, but I don't have a vise like that. I was thinking of maybe putting a smallish Polish vise down there for smaller projects or open for more ideas of attaching vises to a bench.:thumbup:
 

Attachments

  • wheels that work when tipping the stand.jpg
    wheels that work when tipping the stand.jpg
    143.6 KB · Views: 261
  • wheels that work when tipping the stand1.jpg
    wheels that work when tipping the stand1.jpg
    130.8 KB · Views: 235
  • WP_20131017_018.jpg
    WP_20131017_018.jpg
    132.4 KB · Views: 226

Provincial

Well-known member
Joined
Sep 21, 2011
Messages
6,872
Location
Near Salem, OR
I have posted these photos a couple of other threads, but I will repeat them here to show how you can tighten up the fit of a square tube in a hitch receiver should you choose to mount a vise using that idea.

I ran a weld bead on the top and one side of the inner tube, at the rear end and also just inside the front of the receiver. The weld bead is the shiny area in the second photo. I machined the surface of the weld to just slip into the receiver tube with no slop. The measurement over the welded area needs to be about .002" to .003" smaller than the inside of the receiver. Make sure the inside of the receiver doesn't have any obstructions or tight spots. It is best to weld one surface at the rear, machine it, and try it in both directions. If too tight somewhere, determine if you need to take material off the weld or the inside of the receiver. Once it fits correctly, weld the other spots and machine them without changing the setup on the mill.

The vise fits the receiver quite nicely, and has no wobble. :beer:
 

Attachments

  • Vise Mount comp..JPG
    Vise Mount comp..JPG
    29.2 KB · Views: 167
  • Vise comp..JPG
    Vise comp..JPG
    20.7 KB · Views: 150

The Ratchet Man

Well-known member
Joined
Jul 3, 2010
Messages
660
Location
Georgia
can some of you handier members that built your stands show any pictures of the process you did not only to keep the post inside the rim or cement, but also what you used for plate that you mount your vise to. love the ideas of the wheels and here's one I saw that one of our handy members made out of some scrap (plate at base weighs about 400 pounds).

also how you attached the plate to the post even if showing a weld. any bolt on ones would be great to show for those of us that don't weld.

Fretters: I hear what you said about the knee buster, but I don't have a vise like that. I was thinking of maybe putting a smallish Polish vise down there for smaller projects or open for more ideas of attaching vises to a bench.:thumbup:

The first 2 pictures are mine. Unfortunately I'm one of those that has little time to do anything, so when I do, I usually forget stuff like pictures. :D

I'll take some more detailed pictures to post in here a little later.

Basically the base is a 290#, 1 1/2" thick blind flange I got from the scrap yard in exchange for my old washer. The post is 6"x6" square tube filled with sand to deaden noise and vibration. It came with a 1/2" plate already welded to the bottom, and it was already perfectly squared up on both ends, so I left it as is. I chamfered the bottom edges of the post plater then welded it to the base plate.

I then filled the post with sand and welded on the top plate. I chamfered the top edges of the post and then welded the top plate to it with another 7-8 passes per side. There is a 2"x2" notch taken out of one of the corners. I plan to weld in a piece of angle vertically and completely squared to the plate to give me a 90° template when I clamp things to the top. I left a large area to the back and side to do clamping and hammering. There is a piece of C-channel welded diagonally to the post to help support the overhang while hammering.

The vise was mounted to the top plate by studs instead of drilling holes. I like this better since they are easily ground off if I change vises. This vise will NOT be hammered on so the lack of support for the swivel base isn't of much concern.

For the wheels, I welded a piece of C-channel to the base plate, then welded the casters to the channel. I then welded some 1/4" plate on top of each caster to protect them from slag, shavings, sparks and falling objects since they are plastic. They are rated for 300# each. I'm going to get some better wheels later but these were cheap and allowed me to make sure the design worked like I wanted.

The only other thing I want to do is line the bottom of the base with some 1/2" thick conveyor to further deaden noise and shock transfer.

Total weight of stand without the vise is 409#. Its very stable. :)
 
OP
D

drivesitfar

Well-known member
Joined
Oct 23, 2013
Messages
36,037
Location
Pacific Northwest
Provincial: did you use the small little trailer receiver that only needs a couple bolts to attach it to your bench? I see the two flush mounted hex type bolts that are probably holding it, but not sure how the one rounded one in the middle is working because your piece with the vise on it needs to go in that hole farther than that.:dunno:

as far as the plate and the male part of the receiver are you using a piece you can buy and where or are you making that from scratch.

I understand the welds to tighten the fit and great idea, but I don't weld yet so i'll have to use maybe JB weld or some silicone or something like that until I learn to weld.

thanks for sharing and any more pictures from under the bench or maybe a bigger shot if you are able.:thumbup:

Ratchetman: thanks for the details on your homemade stand and any other pictures you want to add later please do. how does it wheel around? would you change any part of it if you made another one?
 
Last edited:

Provincial

Well-known member
Joined
Sep 21, 2011
Messages
6,872
Location
Near Salem, OR
drivesitfar, the receiver is the trailer hitch on my service-bodied pickup. The two bolts are 1/2" flat head grade 8 Allen bolts that I used to tie the frame-mounted hitch to the bumper. The frame-mounted hitch is rated for 10,000 lbs. and the bumper is rated for 8,000 lbs, so I'm not worried about it being strong enough for anything the pickup can pull!

There is a thread in this forum in the last year or so about using 2" square tube and receivers to mount vises. I believe someone welded the larger tube to their steel-framed workbench, and others used flat plates with holes to mount to the underside of wood bench tops/frames. Mounting at a leg connection lets you tie to both the bench top and leg, making the mount much more rigid. It also gives the bench a sort of diagonal brace, as well.

If the thread isn't here, it could be in the fabrication forum.

Look at post #11 in this thread for Jack Olsen's mount on a wooden work bench: http://www.garagejournal.com/forum/showthread.php?t=175873&highlight=vise+mounting

Also look at post #8 in this thread: http://www.garagejournal.com/forum/showthread.php?t=62615&highlight=receiver+vise+mount
 

McBrownie

Well-known member
Joined
Mar 27, 2014
Messages
1,827
Location
Cleveland, OH
This isn't a vise stand, but the concept could be used for a smaller vise. I've seen the monsters on the Vises thread and they would be downright dangerous on a set up like this. Here is what I built out of scrap to get my old Doerr grinder out of the way when not in use.

Here it is in the useable postition:
View media item 41152
Unscrew the handle that is made out of cheap table or dresser leg that I got from one of the big box stores for a $1. It's attached to a piece of 1/2-13 threaded rod.
View media item 41162
That screws into a 1/2 plate that is recessed into the face of my bench and held in with healthy 3" deck screws that go into the 2-by frame. Don't want that thing pulling out. The "table" is just made of 3/4" plywood and screwed and glued together. The threaded rod is held in place with a nylock nut.
View media item 41161
Here it is hanging down.
View media item 41163
A little better picture of the drawer slides. These are actually pretty good ones. They need to hold some weight, so I didn't skimp.
View media item 41159
And stowed away.
View media item 41160
So, how did I figure out dimensions? I started with how tall my grinder was. That let me know how much travel I needed on the slides to get the grinder all of the way under the bench. For the rest, I just kind of winged it. One thing I had to think about was how the heck I mortised that mounting plate into the face of the bench in the right location. Good thing I remembered. I did that by having everything in place for the moveable parts. Then I screwed the handle into the plate (prior to the plate being mounted). So, in other words, the plate was attached to the "table", but not the bench yet. I then held the table in the "useable" extended position (no grinder mounted at this time) and scribed the location of the mounting plate into the face of the bench. A little sawing and chiseling got the job done. In short, the mounting plate is the last thing to get attached, which makes assembling everything else easier.
 
OP
D

drivesitfar

Well-known member
Joined
Oct 23, 2013
Messages
36,037
Location
Pacific Northwest
McB: awesome idea and method of storing your grinder under your bench when not in use. also thanks for the details on the way you made it.

Provincial: thanks for the links and it was good to go back and see a few more pictures of Jack's garage. I actually do have a double trailer hitch sitting new on a shelf that I thought I was going to use for a bike rack while my trailer was attached so it might be a great way to hold my 150 pound vises and grinders.

All: I saw this today and i'm wondering if I should bother buying it. I know it's heavy as heck, but I really like the fact that it can change heights with a foot pedal if needed. of course that is if the hydraulics don't wear out.

also I started another thread about this idea on the fabrication side of the forum because it might be where some other ideas are that we haven't thought of.

http://www.garagejournal.com/forum/showthread.php?t=252799
 

Attachments

  • 00C0C_9TEn1cFfM94_600x450.jpg
    00C0C_9TEn1cFfM94_600x450.jpg
    17.6 KB · Views: 149
  • 00a0a_kEXmkIaTZql_600x450.jpg
    00a0a_kEXmkIaTZql_600x450.jpg
    35 KB · Views: 111
  • 00I0I_2FF4EPcFXXx_600x450.jpg
    00I0I_2FF4EPcFXXx_600x450.jpg
    25.7 KB · Views: 101
  • 00Y0Y_7LvBaD8zyhf_600x450.jpg
    00Y0Y_7LvBaD8zyhf_600x450.jpg
    16.8 KB · Views: 107
  • hitchj.jpg
    hitchj.jpg
    107.5 KB · Views: 123
  • Bench021264899896.jpg
    Bench021264899896.jpg
    137.5 KB · Views: 142

Carves

Well-known member
Joined
Oct 9, 2013
Messages
459
Location
Central West NSW .. Australia
This thing has a variety of uses,
Vise stand, grinder stand, drill press stand, sawhorse, whatever.

Vise can go on either end, or store on the bottom rails.

Good to work around and plenty stable enough for most tasks I undertake.

Would probably need to be bolted down or filled with lead - to partner with some of those impressive, monster vices, lots of you fellas have though .. :D


Tripod16b_zps784b6bd5.jpg
 

2oolhound

Well-known member
Joined
Dec 18, 2010
Messages
5,918
Location
BC Canada
After using Unistrut to make my bike stand extendable I decided to mount a lot of tools on unistrut as well so I could use the bike stand as a bench when it didn't have a bike on it. I wanted to use the trailer hitch idea anyway but unistrut has made it quite versatile. Here is the bike stand with a vise plugged into the back where an extension usually goes to support the rear wheel of the bike. There is another unistrut mounting point at the front of the stand too, it comes out 90' either side.


Here is the pedestal I use otherwise. It wheels outside or wherever. The biggest thing I use it for so far is the 10" grinder and it doesn't move around on me. I can kick a big wooden wedge under it if I want it real stable. I plan to add more docking stations on all the benches and solid places.

 
To avoid these ads, REGISTER NOW!
Top Bottom