To avoid these ads, REGISTER NOW!

Aussie Earthshelter and Garage

Terrick down Under

Well-known member
Joined
Jul 2, 2015
Messages
1,904
Location
Royalla, NSW, Aust.
SO where do we start?
I have done one of those intro pages and some of this is copy and paste from there. So, sorry about the repeats. A lot of the work listed here was done on the “I fixed it for you , now you help me” moto from the last 20 years or so.
We bought the block and started ground works 2001/2. The main priority was to get the main earthworks finished asap, build the garage (guest accommodation) so we had somewhere to live while the Underground house was constructed.
http://garagejournal.com/forum/atta...attachmentid=521640&stc=1&d=14541942214194221
 

Attachments

  • BBQ.jpg
    BBQ.jpg
    80.3 KB · Views: 1,119
  • SiteShed.JPG
    SiteShed.JPG
    59 KB · Views: 907
  • Thermacells.jpg
    Thermacells.jpg
    57 KB · Views: 958
To avoid these ads, REGISTER NOW!
OP
T

Terrick down Under

Well-known member
Joined
Jul 2, 2015
Messages
1,904
Location
Royalla, NSW, Aust.
We first had a site shed delivered to the front of the block so that we had somewhere to stay on weekends while building. It had reverse cycle AC, beds for the 4 of us, I had a 7kVa gen set for power, an esky, a microwave and a wok, and got hold of a site toilet. What else do you need? Well that would be a list and a half. I found a small skid steer trencher with a rock chain that would do all our trenching for power water and waste except for approx. 15ft of solid granite that we hit next to the septic system. We spent from Friday arvo till Sunday evening out there doing everything I could myself, with a little help from some really good friends.
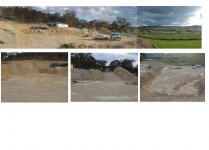
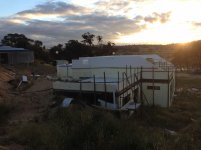
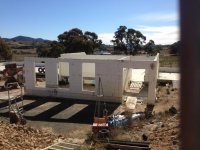
The first job was to get the access driveway and site cut done. Just had to dig up 900m3, that’s almost 1200 cubic yards. The site was split into 3 levels. The top level was for the shed, then Garage level parking, then the lower ground floor for the house.
The shed area and drive were done in two days with a D5 dozer, 5 meter scraper and a 8ft wide paw foot ********. They then started on the garage and parking level, after the next two days I had a call from the boys asking if I had any big recovery gear?????, they had ripped the tracks of the dozer and it had gone down to the culvert about 60 feet away. It took some friends of mine about 3 hours to get it back and onto the low loader. NOW what are we going to use? The local quarry is only 5 miles away so the rock here is blue! After 20 something phone calls I managed to borrow a D9H with the big tooth on the blade.
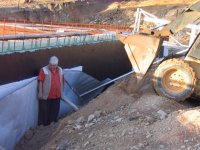
The operator arrived and asked for the layout that we wanted. I showed him the site pegs and the plans, I told him to put the outside rippers over next to the tree, his comment was “this is a D 9 H , it moves everything” so he flashed the old girl up and started to rip into it. After about 20 minutes he was over next to the tree dropping the outside rippers, then proceeded to do a 4 way cross rip with a single ripper. Now we are moving rock. He made a ramp of 45 degrees about 60 feet long, so that he had full throttle momentum to shear the rock each run he did. That is where the pool is going to go now.
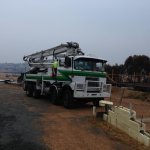
The Shed was built first in 6 weeks, then the House over the last 8 years. But I have listed all the quantities together. For the footings we used a road saw to cut the rock and then an 8 ton excavator to hammer it out. This worked really well and after 8 hours all the footings were ready for prep.
The shed took 12m3 (16 yards) for the footings and the same again for the slab. The house footings took 27m3 (35 yards) and the slab 49m3 (64 yards). Then we started filling walls, for this we bought a well-used 1/2m3 (0.6 yards) mobile mixer with a single cylinder Lister engine. This is economical, it uses 9 litres ( 2 gallons) of diesel a day running from 8am until 6pm. The walls for the shed took 4.5m3 (5.8 yards) to core fill then the treated wooden trusses were thrown up and set ready for the steel roof.
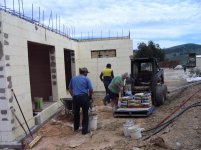
After all the excavations finished we spent the next 6 weeks building the Shed every night and all weekends. We used an insulated site shed with reverse cycle AC and camp beds for Friday night to Sunday night. A portable toilet was left on site for us to use. The girls wanted this. The main focus was getting into the shed so the house was put on hold for a while.
 

Attachments

  • DrivewayShedProgress.jpg
    DrivewayShedProgress.jpg
    98.4 KB · Views: 1,380
OP
T

Terrick down Under

Well-known member
Joined
Jul 2, 2015
Messages
1,904
Location
Royalla, NSW, Aust.
My brother rang and asked if I was interested in recycled internal framing timber, “of course” I said, so I took my 10 ton truck into town and picked a full load, all de-nailed, strapped together and ready to go. After two very late nights a couple of friends helped me to frame up the internal walls and get ready for “Gyprock” (sheet rock). A plumber lent me his tools for the weekend and the PEX piping to plumb it out, done by lunchtime Sunday. I managed to get a 12’ glass sliding door set and 3, 3’x3’ windows for a couple of cases of beer. The electrics I had been saving from the blokes at work, ( I worked with 180 electricians doing domestic and commercial fit outs). I had to get the moths out of my wallet to pay for the LED lights, plaster and the panel door which hurt.
I have been very lucky to have 4 retired builders living around me, so they all came and helped and made sure that this “young fella” was doing it properly, i am now 54. And a couple of really good friends that under stood that I was not having a midlife crisis.


Cooking hints for owner builders:-
GET A WOCK, you can cook;….. wassages, weggs, woodles, worridge, waggetti bolognaise and weef patties for hamburgers. Then the local hardware store had a special on a 6 burner BBQ’s, and the kids were sick of my “W” food.
15.03.2003.jpg

backofgarage.jpg

fromNorth.jpg
 
OP
T

Terrick down Under

Well-known member
Joined
Jul 2, 2015
Messages
1,904
Location
Royalla, NSW, Aust.
We were told that the block had provision for a bore, so the drillers came in and went down for 55m (180ft) and we got 800 gallons per hour of crystal clear water, slightly high mineral content but very nice.
 

Attachments

  • P1000122.jpg
    P1000122.jpg
    152.6 KB · Views: 557

Carves

Well-known member
Joined
Oct 9, 2013
Messages
459
Location
Central West NSW .. Australia
Massive site preparation .. :eek2:

Good job you live north of Cooma, and not south ... otherwise people might think the SnowyMountainScheme was back in full swing .. :D

Look forward to seeing more pictures.
 
OP
T

Terrick down Under

Well-known member
Joined
Jul 2, 2015
Messages
1,904
Location
Royalla, NSW, Aust.
We started our annual October pilgrimage to the Murrumbateman Field day and bought our 5x 22500 litre (approx. 5000 gal) poly water tanks and ended up buying 3x 1000 gal tanks to put up the hill for header tanks as the rock was really bad and the bobcat would only do a small cut to sit them on. Now because of our business we have had a site there for the last 8 years doing our thing, which is domestic waste water treatment systems, pumps and fresh water tanks.
 

Attachments

  • IMG_3825.jpg
    IMG_3825.jpg
    135.7 KB · Views: 670
  • IMG_3819.jpg
    IMG_3819.jpg
    146.6 KB · Views: 698
OP
T

Terrick down Under

Well-known member
Joined
Jul 2, 2015
Messages
1,904
Location
Royalla, NSW, Aust.
We had the usual shire inspections along the way, BUT, I found these to be an adventure more than a drag. They were learning about this method of building as much as we were. So far we have had only one small bad experience and that was due to poor communications of both sides. A shot from downstairs when the inspector was checking the drawings that we had onsite.
1712
SO, I will digress a bit here. We were only going to stay in the garage about 1 year. Well I have had a complete career change, built a business that supports my son, wife and myself. 3 hernia operations. 1 complete hip replacement (also one for my wife) ………Yep, you guessed it we are still in the garage 12 years later. But we are slowly working on the Underground house each week, and it is ready for the upstairs roof which has steel trusses. And everything works….. that’s the part I really like!
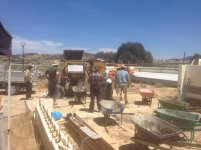
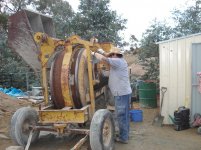
I tend to collect things that will become handy later, this gets me into trouble with you know who every so often. Work benches, steel poles, shipping containers, timber for form supporting, a bloke left his bobcat here 12 years ago and said “use it if you want, just fix what you break”. Man it’s the best shovel/wheel barrow a bloke could ever want. Then a friend and myself went halves in a cement mixer, you should have seen our wives faces when this 3 ½ ton mixer arrived on the back of a huge tilt tray. But it has days where it runs from sun up to sun down and only consumes 9 litres (2 gal) of diesel. We usually have a few friends and neighbours turn up and start mixing core fill at 1/2 m3 (1/2 cubic yard) at a time and slowly do about 10m3 per day. That saves a lot of money.
 

Attachments

  • IMG_1712.jpg
    IMG_1712.jpg
    141.2 KB · Views: 555
OP
T

Terrick down Under

Well-known member
Joined
Jul 2, 2015
Messages
1,904
Location
Royalla, NSW, Aust.
Shed Fillers
In a shipping container I have a 55 Chevy Nomad that I started to rebuild 20 years ago, it’s from The Delaware peninsular and it was full of rust. It’s now in primer with the only original panels being the roof skin and the rear quarters. Late model Aussie front suspension with a Ford 9” rear end held in by “an inverted triangulated coil over 4 bar” rear end. But she is going to have to wait until the House is finished. I have a work area of about 12’ x 20’ for my tools. If I need to do anything I have to go outside. Working outside in the mud is not fun or good for dropping small parts. First thing was to get a slab down in front of the garage, put up a 4500kg two post hoist so that I can lift my 93 Chevy 7.4 Crewcab long bed dually safely. Then I found a portable 31’ x 20’ carport with polycarbonate covering that would fit over the hoist, so now I can be dry and safe.
 

Attachments

  • IMG_0771.jpg
    IMG_0771.jpg
    144.9 KB · Views: 564
  • STA_1774.jpg
    STA_1774.jpg
    140.2 KB · Views: 573
  • IMG_2798.jpg
    IMG_2798.jpg
    144.7 KB · Views: 742
OP
T

Terrick down Under

Well-known member
Joined
Jul 2, 2015
Messages
1,904
Location
Royalla, NSW, Aust.
With the economic down turn in this area things have slowed right down. So I have time to do things but not enough money to get them done. We have been looking at our power consumption and this part of NSW has the dearest power in the state. I got lucky and sat down with a few of our neighbours to get a bulk buy on solar panels. This worked well as 31 homes got between 4kW and 10kW of panels installed and supplying the grid, we have 6.5kW. I still get the bills BUT I they are paying me!! My next goal is to be off the grid by the end of 2016, I just need another 5.5kW of panels and a second inverter, and hopefully the new batteries that will last. At the moment I have second hand batteries that are good but not great.
I like to make things that the average person can’t see that it has been modified. And building cars and trucks are good ways of doing that. I have built 2x 55’s for myself and 4x 55, 56 & 57 Chevys for friends and a couple of trucks. I am helping a 30 year friend getting ready for retirement. We have stretched an 86 Chevy dually by 6’ and are about to drop a ‘49 Diamond T, fireman’s cab 8“over the chassis, it was a ladder truck cab so it is already low. It’s got Honda seats with Aussie steering column; we have raked back just behind the rear spring perches for a lower entry point to the bed. Rear air-assist suspension, for those heavy vehicles and to ease loading. At this point I am making the trailer to go behind it. Tri axle, tilt bed, slight dove tail and 3000kg load capable. LED lights including load lights, reversing full time camera, lift off fenders. But for the registration expense side of things we have got it rated as 3500kg total.
 

Attachments

  • IMG_3912.jpg
    IMG_3912.jpg
    138.9 KB · Views: 547
  • IMG_3907.jpg
    IMG_3907.jpg
    144.9 KB · Views: 561

Bib Overalls

Well-known member
Joined
Dec 4, 2006
Messages
3,318
Location
Jonesboro, Arkansas
Looking forward to seeing how this all folds out. Am I correct in assuming that after construction is finished much of the structure will be backfilled? Do you have a sketch or drawn plan showing the site layout? I'm having trouble pulling this all together.
 
OP
T

Terrick down Under

Well-known member
Joined
Jul 2, 2015
Messages
1,904
Location
Royalla, NSW, Aust.
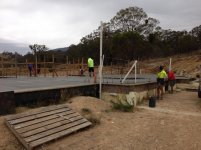
The ground floor slab is sitting on 270mm (10 ½”) thick waffle pods. It took me two weeks to fit the drainage plumbing thru the pods and wet check the whole lot, and 600m (1900ft) of hydronic piping that keep the slab at the right temperature all year round, this took 4 of us 2 days to lay as it is in double layer mesh. I was walking funny for at least two weeks after that. We again contracted out to slab pour to contractors because my back would not have done it.
 

Attachments

  • IMG_1267.jpg
    IMG_1267.jpg
    145.6 KB · Views: 623
  • IMG_1262.jpg
    IMG_1262.jpg
    148.3 KB · Views: 603
  • IMG_1115.jpg
    IMG_1115.jpg
    152.3 KB · Views: 588
  • IMG_1111.jpg
    IMG_1111.jpg
    142.2 KB · Views: 605
  • IMG_1110.jpg
    IMG_1110.jpg
    148.4 KB · Views: 629
  • IMG_1106.jpg
    IMG_1106.jpg
    141.9 KB · Views: 592
OP
T

Terrick down Under

Well-known member
Joined
Jul 2, 2015
Messages
1,904
Location
Royalla, NSW, Aust.
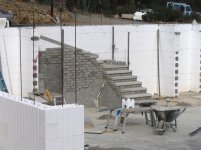
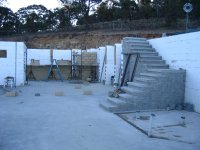
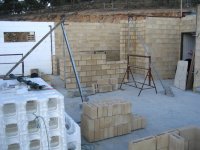
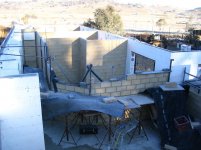
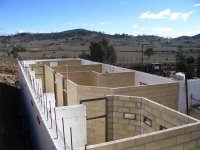
The ground floor internal walls and stairs took a while to erect. The German block craftsman that lives down the road said he would do that job if I did the labouring.
The stair case is based with common cement bricks and topped with precast treads. He pulled down the bricks at least 2 times because the precast steps would not line up perfectly with the aluminium straight edge. It finally finished on the fourth day.
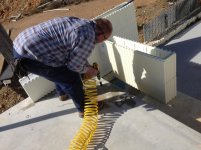
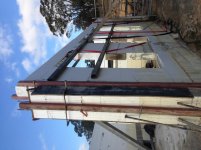
Each of the wall block weighs 8kg (17lb) each. There are 2270 blocks and I moved every block at least 2 times. We did the set out and bottom of one wall in the first day, then the top of the first wall and start of the next wall on the second day….and so on from there. Yes, you guessed it, 4 weeks to finish the walls, and they are absolutely perfect. I am in absolute awe of his patience with my mud mixing abilities and the way he put a straight edge on every single block so that we had one side perfect and the other was a feature wall with the imperfections.
IMG_1383.jpg

IMG_1386.jpg

IMG_1388.jpg

IMG_1409.jpg

IMG_1413.jpg
 
OP
T

Terrick down Under

Well-known member
Joined
Jul 2, 2015
Messages
1,904
Location
Royalla, NSW, Aust.
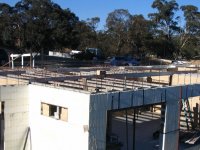
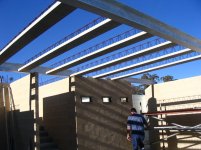
The ground floor roof took a bit of work to set up. Firstly the main 19 beams that cover the west wing were delivered 250mm ( 10") short. I can't repeat what I told the company, but I gave them some very direct suitable work directions. So after one month the replacement arrived. Each one of the precast beams were carried into the house by hand then lifted with a genie lifter into position. Then the inserts were laid down trying to minimize any waist. Once they were down we could start to run all the water and electrical conduits. Then the fresh air returns and light tubes. I was sitting on a plastic create just going over and over each run to make sure I had enough, because once the concrete is poured, no more holes. Walking at 3m (9ft) up can be a bit daunting when trying to carry 8ft lengths of polystyrene in the wind.
Oh yes, one of my friends has a little crane. Don't you just love mates.
IMG_1544.jpg

IMG_1545.jpg

IMG_1548.jpg

IMG_1551.jpg

IMG_1618.jpg

IMG_1688.jpg
 

1953mercury

Well-known member
Joined
Nov 25, 2012
Messages
701
Location
Steamboat Springs CO
Very nice place, will be quite the palace when your done. Your work shows a lot of talent and perseverance. Hope things are picking up for you business wise. It was very slow here after the 08' fiasco also, but finally starting to come around. I will follow your build with great interest as I will be starting my own earth sheltered house in the next 2-3 years on the 15 acres we purchased next to our existing home. Hoping to have it done by the time I'm 70, and I'm designing it to be a minimal maintenance building.The only exposed surfaces will be stone and glass with a metal shed style roof just above grade to collect rain water for domestic use. Cheers, Mike
 
OP
T

Terrick down Under

Well-known member
Joined
Jul 2, 2015
Messages
1,904
Location
Royalla, NSW, Aust.
The downstairs living areas are just needing ancillary electrical and plumbing after the ceilings and front walls are plastered. All the double glazed windows have been sitting in the other carport for 3 years waiting for me to get things finished. The rest of the internal walls are double faced 90mm (3 5/8”) load bearing block. The lower roof is “ezidek” which uses 180mm (7”) thick polystyrene form supported by light weight concrete girders. This roof gives us a really good thermal insulation and after the concrete is poured it gets another 80mm (3 ½”) of high density poly board then 500mm (19”) of dirt on top of that. “QUIET and COSY”.
IMG_1744.jpg

IMG_1745.jpg

IMG_1755.jpg

IMG_1759.jpg
 
To avoid these ads, REGISTER NOW!
OP
T

Terrick down Under

Well-known member
Joined
Jul 2, 2015
Messages
1,904
Location
Royalla, NSW, Aust.
Upstairs (ground floor)
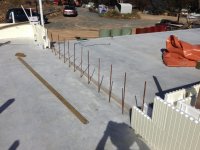
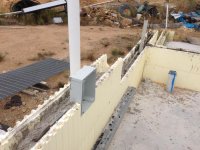
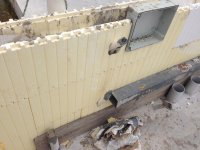
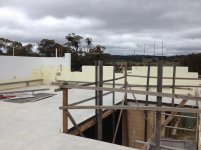
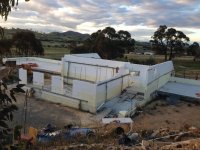
Well when the concrete roof had cured I got out the tape measure and my sketch of where the reo is in the roof so that I could drill the starter bar holes for the upstairs walls. A slow tedious job of mark, check, check, check and drill, clean out the hole. Get all the starter bars ready and glue into the holes in the straight up position. Then we started to layout the new blocks for the walls. While we had taken some time to get from downstairs to upstairs the supplier had changed the size of his ICF blocks, so we had to work out the windows and walls so that it all joined properly. AND line up with the conduit coming up thru the slab. Got all that done and my dear wife says, I’d like the walls to be 300mm (12”) higher please “*&%$@#!*^&, yes dear”. Now what could go wrong….being 6 blocks short, so with a couple of creative breeze cut-outs for inserts later, job ready.
SO I dragged the cement mixer up to the upper level and ordered the sand/gravel mix and a couple (6) pallets of cement. I was mixing the core fill to make it water proof so no rising damp problems….needed another pallet of cement. That’s 72 bags. The open sections look really nice but caused a bit of extra work when setting up and making sure they stayed straight and still.
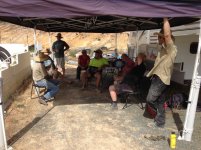
How often have you sent out a text to a couple of mates and only one replies, well I sent out 15 and they all turned up to help....YES!
IMG_2379.jpg

IMG_2380.jpg

IMG_2381.jpg

IMG_2654.jpg

IMG_2658.jpg

IMG_2665.jpg
 
OP
T

Terrick down Under

Well-known member
Joined
Jul 2, 2015
Messages
1,904
Location
Royalla, NSW, Aust.
These are some of the last core fills done, the 3 of us did the first pour on the footing almost 8 years earlier. The big window openings are going to have changeable panels fitted. That way when DW decides she wants something different it is easier to change. that drink was so good, it was a 2hour push before the weather was supposed to turn nasty and we had just enough plastic to cover the top to stop damage. The steel tube is 3 1/2" square in 24ft lengths which makes it easy to keep the walls straight, just takes a bit of thinking to get them up there, because the walls are not stable without concrete!!! I used them first to do the footings downstairs and got it within 1/8" level over 110ft. I cheated because the pickets were driven into the rock and then the form was tack welded to them. Don't kick them with your sandals on!!
IMG_2904.jpg

IMG_2970.jpg

IMG_3158.jpg

IMG_3209.jpg
 
Last edited:
OP
T

Terrick down Under

Well-known member
Joined
Jul 2, 2015
Messages
1,904
Location
Royalla, NSW, Aust.
Ahhh, water proofing.
This is another thing that I agonised over. So I did what everyone said…one bloke said a coat of waterproof render….another said a coat of tar based sealer…another said cover with polystyrene….use drainage cell fabric with geotech mesh… vent the sub drainage to prevent moisture build-up.
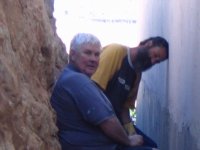
So I did two of each to be sure. It has worked quite well. When the shire was inspecting, he said that I should not upset my friends that were giving me advice because this place is going up really well. The quality was also high. This gave me a slightly inflated ego for a while. But my good mates soon brought me back to earth. The hardest part was putting on the render and black tar emulsion. It was hot and very cramped.
IMG_1704.jpg

IMG_1705.jpg

IMG_1712.jpg

IMG_1759.jpg
 
OP
T

Terrick down Under

Well-known member
Joined
Jul 2, 2015
Messages
1,904
Location
Royalla, NSW, Aust.
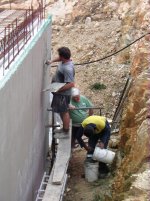
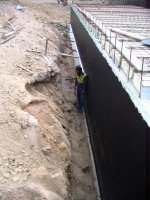
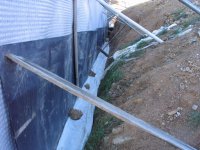
After the two coats of modified water proof render went on and cured we had to clean out the drainage trench that was cast into the footings. Then start with the black tar emulsion. The lowest 12” was brushed by hand as it has to bond the footing to the wall, so I put it on real thick (2 coats). The rest was rolled on which was hard but very fast coverage.
IMG_1761.jpg

IMG_1794.jpg

IMG_1802.jpg

IMG_1805.jpg

IMG_1806.jpg
 

gazza

Well-known member
Joined
Dec 24, 2009
Messages
364
Location
Melbourne Aust
Wow, following this with a lot of interest, great build even it has taken a few years.
I'm glad you started years ago cause the constant updates are easy to follow and you can understand the build as it goes.
Also thanks for all the pics.
cheers
Gazza
 
OP
T

Terrick down Under

Well-known member
Joined
Jul 2, 2015
Messages
1,904
Location
Royalla, NSW, Aust.
Thanks for looking in,
HOTFR8, I have looked thru your build and wondered wether or not to do a pit, but the amount of blue rock slow that thought down.
1/2CUP, I read your column as often as I can. it is very enjoying.
Bib Overalls, yes the west and east ends have almost 2ft of dirt on them and its like a normal two story house but upside down. upstairs are laundry, TV room, gym, entry hall and garage. Down stairs has kitchen, dining, 3 bathrooms, 4 bedrooms, MIL has a kitchenette and her own lounge. All up the house and attached garage are about 480m2 (5100sq ft). I will post the plans soon.
Gazza, thanks for looking in also, I will try to keep you all entertained.
 
OP
T

Terrick down Under

Well-known member
Joined
Jul 2, 2015
Messages
1,904
Location
Royalla, NSW, Aust.
1953 Mercury, GO FOR IT. I wish I had started earlier. Even with no windows the back wall is usually around 18C even when its 0C outside. When we were core filling the garage walls the bottom section (core filled a couple of days earlier)would be dry and the empty blocks above would have 1/2" ice on them in the morning.
The whole difference in the karma is hard to explain. I thought it would be closed in feeling, but it doesn't. we stopped in a earth-berm house in Sale Victoria, it was nice, different style with the hospital vynal floors and walls in the wet areas and a boiler end cap for the ceiling of the tv/music room, they had tiny speakers that just pounded the sound around the room.
When I was in SLC Utah, I stayed in a friends two story earth shelter. They had double glazing and such warm wood every where. It too was very nice.
Don't forget to insulate everything...a big lesson I learned from others.
if you want more details send a PM.
 

BuickFarmer

Well-known member
Joined
Apr 5, 2006
Messages
1,415
Location
Athens, Georgia
WOW quite a build! So the earth shelter will be sort of a "Downunder Downunder" ... Sorry , couldn't resist:D
Look forward to following
 

Playwme

Well-known member
Joined
Sep 13, 2012
Messages
2,032
Location
The Lucky Country Down Under
Awesome! Great to see a neighbour on here (I live in Dickson and have the weekend property out near Bungendore). Pretty sure I've seen your Dually around town, can't be too many like that in Canberra.

Great write up and very impressive build. That's a nice looking spot on the side of the valley and you've obviously got some great neighbours there with some very handy little toys. Looking forward to the next installment.
Have you got a picture of that 3.5 tonne mixer? My weekender is a bit far out for the cement trucks and I was thinking an onsite batch plant might be my best option. Just bought an 80hp Kubota with a front end loader and converted my Toyota Dyna to a tipper so those should help out a bit.
 
OP
T

Terrick down Under

Well-known member
Joined
Jul 2, 2015
Messages
1,904
Location
Royalla, NSW, Aust.
Its been raining here on and off all day, so working on plastic septic lids with methane gas and live electrical is not considered good for the health. So I have been catching up on some reading here. getting some good ideas for the garage when we get the house finished...my wife aint gunna like that, see says I get too many hair brained ideas already.

Playwme, thanks for dropping in. Its the usual way, you look around the world and meet people in your back yard. There have been some adds for old agitators on Gumtree a couple of months ago. One I saw had a hole cut in the side, guess it rolled over when full. We service Bungendore once every 3 months, from Buckingham estate to Captains Flat in one very big and busy day.

JWHCARS, I try and learn something new everyday, it sorta makes up for not paying attention at school.

PHWL, when I lived in Sydney, Roselands was a potato farm.
 

madoc1

Well-known member
Joined
Dec 11, 2012
Messages
1,242
Location
spicewood, tx
looking great! good for you. many dyi projects this large just run out of steam and never get finished. pls keep up the posts.

jim
 
OP
T

Terrick down Under

Well-known member
Joined
Jul 2, 2015
Messages
1,904
Location
Royalla, NSW, Aust.
Thanks guys'n'gals,
The comment about long projects not getting finished (I know there was no malice intended) have been lingering every time I have been hospital. Especially last time...full left hip replacement, in short the ball and socket were too tight a fit, dry it was super smooth, but 4 hours after it was in my body and the body fluids got between them and they hydraulic ( dislocated) out. I was still out from the anaesthetic (low blood pressure), but the 3 other people in the room said that I bent up like a capital V, screamed and passed out again. In short they replaced the ball and socket again after they opened me up 3 times in5 days, I have a really neat 42 staple scar from it. So I spent an extra week laying there having physio. Got to thinking "what if"....
So yes, I try and do something done each week while getting the money together for each stage.

SO to all those out there..." don't get despondent if things are slow, time and all of us are willing you on"
Terrick
PS please see attached pic of the mixer
IMG_2834.jpg

DSC02495.jpg
 

wasfast

Well-known member
Joined
Apr 10, 2014
Messages
874
Location
San Diego CA
I thought I read carefully but what's the area (sq ft or sq meter) of the 2 levels when complete? Amazing scope of undertaking to build this and stick with it all these years!
 
To avoid these ads, REGISTER NOW!
Top Bottom